Candle Wick Size Guide
By Nadia Colbert, candle maker since 2014 · Updated
Almost every candle that disappoints its maker disappoints for the same reason. The wick and the container were not matched. Wax type, fragrance, and dye all matter, but the wick decides how wide the flame burns and therefore whether your candle melts evenly to the glass or drills a narrow hole straight down the middle. This guide covers the numbering systems you will meet when you shop for candle wicks, how to read a melt pool, and how to work out how much wax per candle you actually need.
In this guide
Why wick size decides the candle — the melt pool rule in one paragraph.
Wick numbering systems — CD, ECO, LX, HTP and friends, in one table.
The wicks in the Waxwright kit — what ships in the box and what is published about it.
How much wax per candle — the water test, with worked numbers.
Running a proper test burn — the four-hour check that settles every argument.
Why Wick Size Decides the Candle
A candle flame does not burn wax directly. It burns vapor. The wick draws liquid wax up by capillary action, the heat of the flame turns that liquid into vapor, and the vapor is what produces light. Everything follows from how fast the wick can move fuel. A thin wick moves fuel slowly, keeps the flame small, and heats only a narrow ring of wax around itself. A thick wick moves fuel quickly, keeps the flame tall, and heats a much wider ring.
The practical measure of that ring is the melt pool: the pool of liquid wax on top of the candle while it burns. Candle makers watch two things about it. The first is width. A melt pool that reaches the container wall means the whole surface will burn down level, session after session. A melt pool that stops short leaves a permanent rim, and each burn digs the tunnel deeper until the flame drowns in its own well. The second is depth. A very deep pool means the candle is running hot, which shortens burn life and can overheat the container.
Because the container sets the distance the heat has to travel, wick choice is really container choice in disguise. A narrow vessel needs a small wick. A wide one needs a bigger wick or several small ones. Container height matters far less than diameter, which surprises most beginners. This is why the same wick that behaves perfectly in a slim glass will tunnel badly in a wide tin, and why you should treat every new container style as a fresh experiment rather than assuming your favorite wick travels.
If you are still deciding which vessels to work with, the walkthrough in how to make candles at home covers the pouring sequence, and the candle making supplies page lists what a first setup actually needs.
Wick Numbering Systems, Decoded
Newcomers reasonably expect wick sizing to work like shoe sizing, where a number means the same thing everywhere. It does not. Each family of wicks is a separate ladder. The number tells you where a wick sits on its own ladder, and nothing about how it compares to a wick from a different family. Once you accept that, the whole system becomes easy to navigate, because you only ever need to learn one ladder at a time.
| Wick family | Construction | Commonly used for | Numbering behavior |
|---|---|---|---|
| CD | Flat braided cotton with a thin paper filament | Soy and vegetable wax containers | Higher number, wider melt pool |
| ECO | Coreless cotton with paper filament, curls while burning | Soy and soy blends | Higher number, wider melt pool |
| LX | Flat braided cotton, stabilizing thread | Paraffin and blends, some soy | Higher number, wider melt pool |
| HTP | Coreless cotton, self-trimming curl | Waxes with a high fragrance load | Higher number, wider melt pool |
| Flat braid (44, 51, 60 and similar) | Plain braided cotton | Pillars and tapers | Higher ply count, larger flame |
| Wood wicks | Thin wood strip in a metal clip | Wide containers, crackle effect | Sized by width and thickness, not by number |
The descriptions above are the general conventions of the trade, given so that you can read a supplier listing with confidence. They are not measurements of any particular manufacturer's product, and any wick you buy should be judged by how it burns in your container rather than by its label.
One more habit is worth building early. Whenever you find a pairing that works, write down the wick code, the container, the wax, and the fragrance percentage on an index card. Candle making is a craft of small variables, and the makers who get consistent results are the ones who keep notes. Our own testing method is described on the how we test page, and it is nothing more sophisticated than notes and patience.
The Wicks in the Waxwright Kit
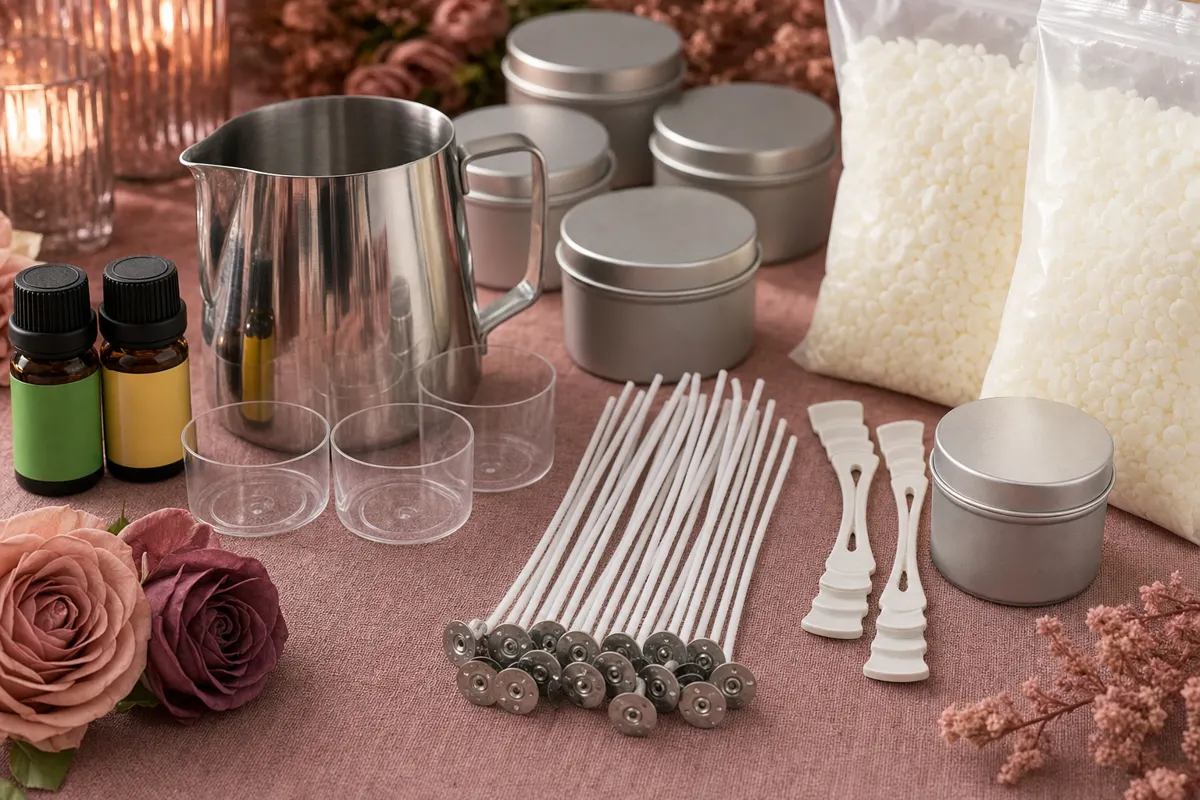
Here is the full contents list, because it explains what you can and cannot test straight out of the box. The candle making kit contains one stainless steel melting pitcher, two bags of soy wax, 50 candle wicks plus 20 extra wicks, four candle tins with lids, ten plastic candle jars, two fragrance oils in lemon and vanilla, four color dyes, two wooden centering devices, one stainless steel spoon, 56 glue dots, and a user manual. Everything arrives in a box measuring 8.46 x 5 x 4.9 inches, or 21.5 x 12.7 x 12.5 cm.
The wicks are pre-waxed, which matters more than it sounds. A pre-waxed wick lights immediately on the first burn instead of charring while it soaks up fuel, and it stands upright on its own while you pour. The metal sustainer is the small disc at the base. It anchors the wick to the bottom of the container, which is what the 56 glue dots are for, and it also acts as a safety stop by snuffing the flame when the wax runs out. Both features are standard for container wicks and both are useful for a first kit.
What the supplier does not publish is a size code. There is no CD or ECO number printed for these wicks, and the wax bags do not carry a stated weight either. Rather than guess at figures, the honest approach is to work from what is in front of you: the two container styles in the box, and a first burn that tells you how the pairing behaves. The tins measure 2.36 inches across by 1.57 inches tall, and the plastic jars measure 1.54 inches in diameter by 0.98 inches tall. Both are narrow vessels, which is the easiest case for a wick to handle.
If you plan to move beyond the containers in the box, the soy candle making kit page explains what soy wax asks of a wick, and buyer feedback on first candles is collected on the reviews page. Across the supplier's verified listing data for 2026, the kit holds a 4.6 out of 5 average across 120 verified reviews with more than 900 units sold.
How Much Wax per Candle
The water test works because wax is lighter than water for the same volume. Soy wax sits at roughly 0.85 to 0.9 of the weight of water, which is close enough that the multiplier gives you a usable number on the first try. Set your container on a kitchen scale, tare it, fill it with water to the level you intend to pour, and read the weight. Multiply that reading by 0.85 and you have your wax weight for one candle. Multiply again by the number of candles and you have your batch.
Working through the containers in this kit shows how the math lands. Taking the published outside dimensions at face value, a tin at 2.36 inches across and 1.57 inches tall works out to a little under 4 fluid ounces of space, and a plastic jar at 1.54 inches across by 0.98 inches tall works out to roughly 1 fluid ounce. Those figures describe the outside of the vessels, so real capacity will be slightly less once wall thickness and pour headroom are accounted for. Use them to plan, then let the scale give you the final number.
| Container | Published dimensions | Approximate volume from those dimensions | What to do before pouring |
|---|---|---|---|
| Candle tin with lid (4 in the kit) | 2.36 x 1.57 in (60 x 40 mm) | Just under 4 fl oz | Water test to confirm, then leave pour headroom |
| Plastic candle jar (10 in the kit) | 1.54 in diameter x 0.98 in tall (39 x 25 mm) | Around 1 fl oz | Water test to confirm, then leave pour headroom |
| Stainless melting pitcher (1 in the kit) | 3.74 x 4.21 in (95 x 107 mm) | Around 25 fl oz by outside dimensions | Melt in batches rather than filling to the brim |
The dimensions in this table are the ones the supplier prints. The volumes are arithmetic applied to those dimensions, offered as a planning shortcut rather than as a capacity claim. Your scale is the authority.
Two bags of soy wax come in the box, and the supplier does not state their weight, so plan your first session around the containers rather than around a target yield. Melt enough for the vessels you intend to fill, pour those, and keep the remainder solid in the bag. Wax reheats without harm, and a small leftover is far easier to deal with than a pitcher of surplus that sets before you can use it. The one thing worth avoiding is melting the whole supply on the first evening, because you lose the ability to adjust after seeing how the first candles burn.
Running a Proper Test Burn
Give a new candle at least 48 hours to cure before you test it. Soy wax continues to crystallize after the pour, and a candle judged on the same evening will burn differently from the same candle a week later. Trim the wick to about a quarter inch before lighting, since an untrimmed wick exaggerates every problem and makes a good pairing look bad.
Then watch. In the first hour, the melt pool should widen visibly. By hour two or three it should reach or nearly reach the wall in a narrow container like the tins and jars in this kit. The flame should stand steady, taper to a point, and stay under roughly half an inch. Some flicker is normal, particularly near a door or vent. A flame that dances constantly, throws visible smoke, or leaves a dark film on the glass is telling you it has too much fuel.
The rule that saves the most time is to change one thing between tests. If the candle tunnels, either move to a larger wick or move to a narrower container. If the candle sooted and ran hot, go the other way. If you change wick and fragrance percentage at once, you will learn nothing from the result. This is slower than it sounds only on paper. In practice two or three careful tests settle a container style for good, and after that you pour with confidence.
A few results have causes that are not the wick at all. Frosting, the pale crystalline bloom that appears on the surface of soy candles, is a natural property of vegetable wax and does not affect the burn. Wet spots, where the wax pulls away from the glass in patches, come from cooling too fast rather than from wick choice. Both are covered in the soy specific walkthrough in how to make soy candles. If the scent seems weak, the cause is more likely to be fragrance load or pour temperature, which the candle fragrance oil guide goes through in detail, and wax behavior itself is compared family by family in the candle wax types guide.
Seventy wicks between the main set and the spares gives you room to be methodical, which is really the point of a starter kit. You can afford to sacrifice a few candles to learning rather than treating each one as precious. That same margin makes the kit a reasonable choice for a shared project, and the candle making kit for adults page covers what a session with several people looks like. The kit sells for $49.99, marked down from $69.99, with free shipping, delivery in 8 to 10 business days, and a 30 day guarantee.